
Solar Panel Quality Control 2026: Inspection Standards Breakdown
Solar panels power millions of homes and businesses. Their reliability really hinges on strict quality control and inspection standards.
In 2026, the solar industry faces growing challenges—module breakage, manufacturing defects, and performance gaps between promised and actual output. These issues make quality control more crucial than ever if you want your solar investment to perform as expected.

Solar panel quality control in 2026 means following international standards like IEC 61215 and IEC 61730. Multiple inspection stages—from manufacturing to installation—help catch defects before they cause system failures or safety hazards.
Recent data reveals module breakage rates between 1-5% under normal field conditions. Manufacturing defects like cell alignment, lamination issues, and connector problems still affect system performance and safety.
Understanding current inspection standards helps you make smarter decisions about solar panel procurement and installation. The right quality control steps can prevent costly repairs, protect your warranty, and make sure your solar system delivers what you paid for over its lifetime.
Key Takeaways
- Solar panel quality control needs multiple inspections from factory production through final installation to meet safety and performance standards.
- Common quality issues include module breakage, manufacturing defects, and connector failures that cut system output and create safety risks.
- Third-party testing and batch inspections give more reliable results than just trusting manufacturer specs.
Overview of Solar Panel Quality Control in 2026
The solar industry’s under pressure to improve manufacturing standards as module breakage rates hit 1-5% under normal conditions. Quality control now covers more than just performance—it has to tackle real-world durability and safety, too.
Current Trends and Market Demands
Module breakage is a big problem in 2026. Rear glass fractures more often than the front, even when hail doesn’t crack what you see.
Some modules snap in half during moderate winds, which exposes real structural weaknesses. That’s not exactly confidence-inspiring.
The gap between manufacturer specs and actual field performance keeps growing. Some folks say manufacturer PAN files exist “for entertainment purposes only,” since stated performance rarely matches what happens in the real world.
Your solar energy system probably sees degradation rates around 0.7% a year, which is higher than most warranties plan for.
Manufacturing defects are still a safety headache. Cell alignment and lamination issues can leave too little space between components, which risks short circuits, arcing, or even field fires when safety distances aren’t met.
New production regions—especially in the U.S.—show higher rates of manufacturing mistakes than established facilities. That trend affects how you choose suppliers as the solar market spreads to new areas.
Role of Quality Control in Solar Energy Systems
Quality control now focuses on three main inspection types: in-process monitoring, final inspection, and testing validation. Each stage targets different failure modes before modules reach your installation site.
System-level failures cost a lot more than just swapping out modules. One 350MW site spent $3 million fixing faulty module-to-module connectors alone.
Connector quality really matters, since those little components can cause big underperformance headaches.
New testing approaches now include asymmetric load testing and tougher test-to-failure protocols for hail resistance. These methods mimic the real conditions your modules face over their lifetime.
Drone-enabled daylight photoluminescence imaging now captures how modules perform while systems are running. That helps with inspections and makes warranty claims a bit less painful.
Inspection Standards and Regulatory Compliance
Solar panels have to meet specific inspection standards and regulatory requirements before hitting the market. The National Electrical Code updated its 2026 requirements, and international certifications like IEC 61215 and UL standards still set the bar for safety and performance testing worldwide.
NEC 2026 Code Updates
The 2026 National Electrical Code has new rules that affect how you design and install solar PV systems. These changes impact safety, grounding, and installation methods.
The new code can affect your project timeline and procurement decisions. You’ve got to check that your modules and components meet the revised electrical safety specs before you install anything.
This means updated labeling requirements and documentation standards. Your teams need to follow the new rules for conductor sizing, overcurrent protection, and system grounding.
The code also brings in new requirements for rapid shutdown systems and arc-fault protection devices.
International Certification Requirements
IEC 61215 is still the main standard for photovoltaic module design qualification. This standard tests modules through thermal cycling, damp heat, and mechanical load testing to make sure they can handle environmental stress.
The testing covers:
- Thermal cycling for temperature change resistance
- Damp heat exposure at high temperature and humidity
- Mechanical load testing for wind and snow
- UV exposure for solar radiation resistance
- Humidity freeze for temperature swings
Modules also have to meet IEC 61730 safety requirements. This two-part standard checks electrical insulation, leakage current, fire resistance, and electrical isolation to avoid shock hazards in operation.
CE Marking and Underwriters Laboratories
CE marking is mandatory for solar panels sold in Europe. The CE mark shows your products meet EU safety, health, and environmental standards before they’re distributed.
Underwriters Laboratories (UL) certifies for the U.S. market using UL 61730 and UL 1703 standards. UL 1703 covers flat-plate photovoltaic modules and panels, including construction and safety testing.
Modules need UL certification from Nationally Recognized Testing Laboratories before they go into U.S. systems. This certification checks electrical insulation, fire performance, and safe system integration to meet American safety expectations.
Role of IEC and UL Standards
The International Electrotechnical Commission (IEC) sets up testing procedures that form the backbone for global solar panel certification. IEC standards give consistent evaluation criteria across markets and manufacturers.
IEC 61853 measures module performance under different environmental conditions. It checks efficiency across several operating scenarios and helps with energy output predictions for design.
UL standards adapt IEC frameworks for North America and add specific safety criteria. You should check that your supplier holds both IEC and UL certifications if you want to access global markets and meet regional compliance.
Types and Timing of Solar Panel Inspections

Solar panel inspections happen at different stages to catch quality issues before they become expensive problems. Pre-shipment checks verify finished products, production monitoring looks for defects during manufacturing, and field inspections keep system performance on track after installation.
Pre-Shipment Inspection
Pre-shipment inspections take place after panels are fully assembled but before they leave the factory. This last quality check confirms that photovoltaic panels match your specs and actually work.
Inspectors check the physical condition of panels, batteries, inverters, and accessories for damage, scratches, or deformities. They make sure sealants are properly applied around the edges and verify branding and origin marks. The inspection also measures length, width, thickness, and diagonal differences.
Key testing elements include:
- Power, voltage, and current output checks
- Hi-Pot electrical safety tests
- Temperature performance checks
- Polarity verification
- Complete system assembly tests with inverters and batteries
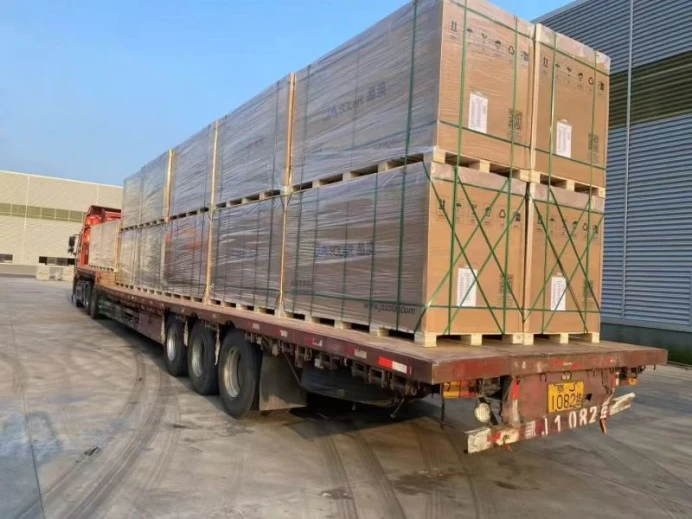
Inspectors also look at packaging to confirm quantities, protection for shipping, and correct shipping marks and labels. This is your last shot to catch problems before products ship out.
During Production Inspection
During production inspections catch defects while manufacturing is still happening—not after thousands of units are done. You can schedule these checks when 20-50% of your order is finished.
Inspectors verify that pre-selected cells meet quality standards before they go into panels. They check glass control for mechanical resistance and clarity. Lamination time and control stages throughout production also get confirmed.
Common defects include water ingress, wrong cell colors, bubbles, micro-fractures, broken or chipped cells, and glass scratches. Inspectors also check cell string alignment, cable lengths, insulation resistance, and battery performance.
Small imperfections can really cut the working life of your final product. Catching them early saves money and avoids customer headaches.
Routine Field and Post-Installation Checks
Your solar panels need regular inspections after installation to keep efficiency up and meet warranty requirements. Commercial systems usually need annual professional inspections to satisfy insurance.
New systems might need less frequent monitoring in their first few years. System age, weather, and performance indicators shape your inspection schedule.
It’s smart to do visual self-inspections more often to spot obvious problems like damage, debris, or loose connections. Professional field inspections check mounting systems, electrical connections, inverter operation, and overall power output.
They also look for unapproved electrical or structural changes that could cause compliance issues.
Annual checks should include:
- Panel surface condition and cleanliness
- Mounting hardware tightness
- Wiring and connection integrity
- Inverter display readings and error codes
- Overall system power production vs. expected output
Catching problems early through routine inspections keeps small issues from turning into expensive repairs.
Key Inspection Procedures and Checklists
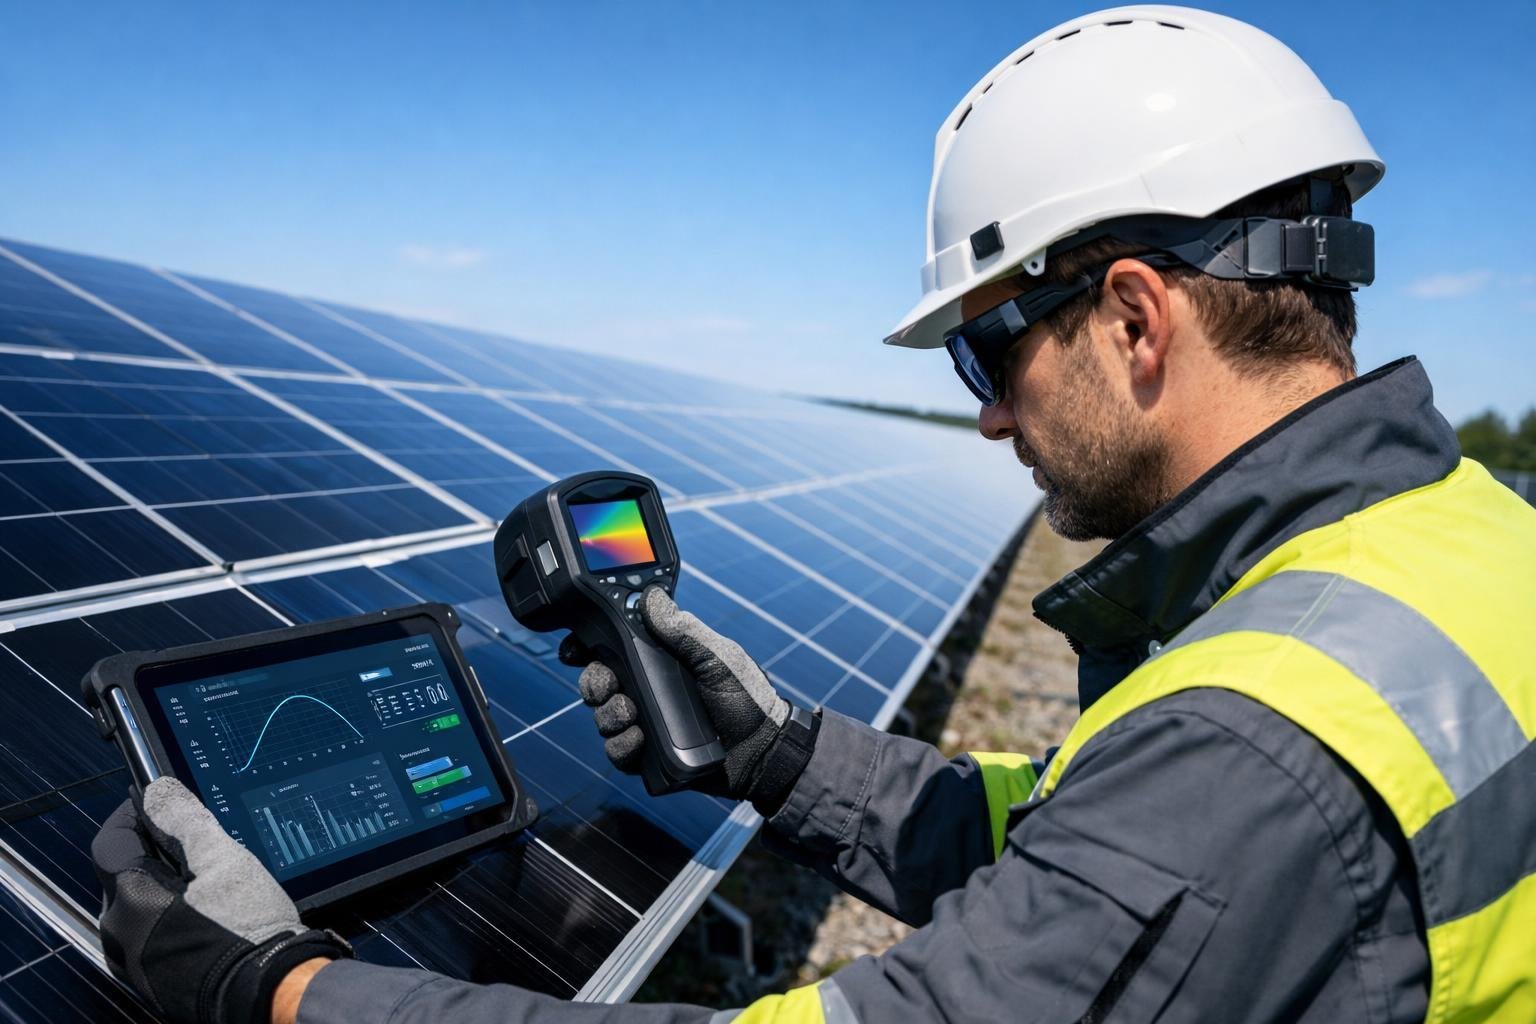
Quality control for solar panels relies on three main inspection methods. Visual checks spot physical damage and manufacturing flaws, electrical testing confirms proper connections and grounding, and thermographic analysis picks up hot spots that drag down panel efficiency.
Visual Inspection for Cell and Module Defects
Take a close look at each solar panel for visible damage that could impact performance or safety. Scan for cracks in the glass, cell discoloration, or scratches on the module.
Check the frame for dents or warping. If you spot any, that’s a red flag for structural issues.
Cell defects can show up as broken fingers on the cells, dead spots, or micro-cracks. Some of these are tough to see without special gear.
Peek inside the junction box for loose connections, poor seals, or signs of physical damage. The back sheet should look clean—no tears, bubbles, or delamination.
Make sure all labels match the panel specs and certifications are visible. Check the alignment of PV panels in the array; sloppy installation means trouble down the road.
Note any discoloration, snail trails, or burn marks on the cells. These are signs of deeper issues.
Look over mounting hardware and roof penetrations to confirm everything’s secure and weatherproof. If trees or nearby structures cast shade on the array during peak sun, that’s a problem you can’t ignore.
Electrical and Grounding Inspections
Double-check that every electrical connection meets safety codes and local requirements. Test the grounding system to make sure it can safely handle fault currents.
Verify wire gauges match the specs, and tighten up every connection. Insulation should be intact everywhere.
Measure output voltage and current under standard test conditions. The numbers should line up with rated specs.
Test for short circuits, open circuits, and correct polarity throughout the system. Make sure circuit breakers and disconnects are the right size and clearly labeled.
Confirm that inverter connections are tight and set up correctly. Protect all wiring from weather and physical damage.
Keep conduit runs neat and stick to the approved plans. Test ground fault protection devices—they need to work right every time.
Check that all equipment grounding conductors are continuous and properly bonded. It’s tedious, but skipping this step could lead to nasty surprises later.
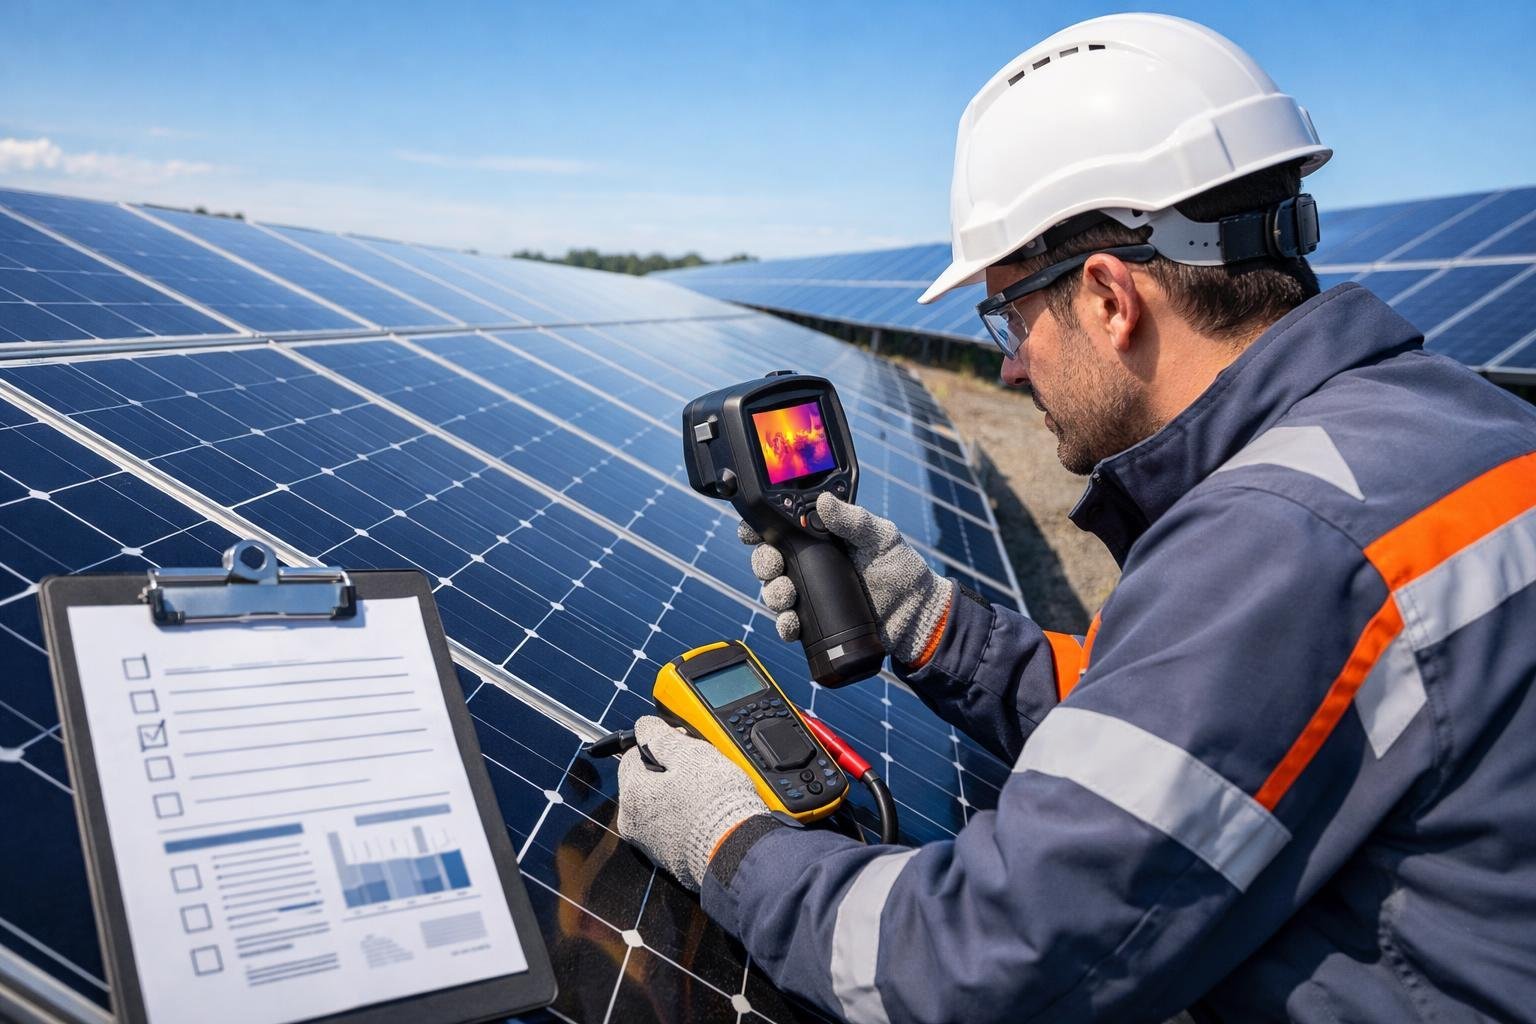
Hot Spot and Thermographic Testing
Hot spots show up when certain cells overheat due to defects or shading. Use infrared thermography to spot temperature differences across PV panels.
If you see areas more than 10°C hotter than the rest, that’s likely a problem. Run thermographic tests during peak sunlight, when panels are working hard.
This method uncovers cell defects, bad connections, and bypass diode failures. Hot spots can do permanent damage and speed up panel aging.
Be thorough with your thermal inspection—cover the whole array. Record temperature readings and compare them to what the manufacturer says is normal.
Consistent hot spots need quick action to avoid safety risks and loss of output. Watch for partial shading that causes local heating.
Check that bypass diodes work as intended to keep hot spots in check. It’s a small detail, but it makes a big difference.
Common Quality Issues and Corrective Actions
Solar panel manufacturing often runs into specific defect patterns that can affect long-term performance and safety. Knowing what to watch for and acting fast keeps products reliable and up to industry standards.
Identifying Frequent Defects in Panels
Lamination problems are the most common manufacturing issue you’ll see during inspections. Bubbles and edge delamination happen when encapsulant materials aren’t stored right, or if process controls slip during lamination.
These flaws break the panel’s protective seal and can let moisture sneak in. Cell defects come in all shapes—microcracks usually form during handling or transport and they cut electrical output.
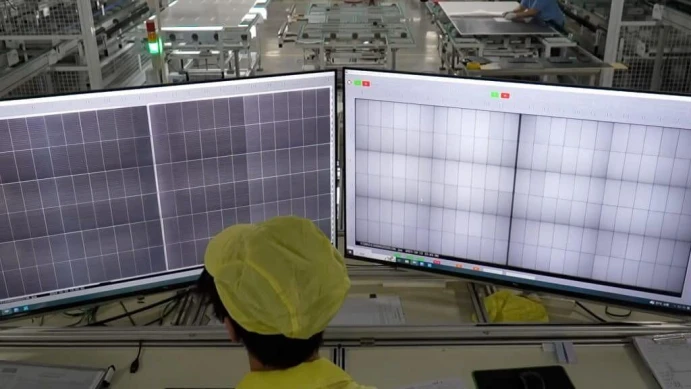
Electroluminescence (EL) imaging helps you spot these hidden cracks, which regular visual checks miss. Junction box assembly errors are another headache.
Poor soldering, not enough adhesive, or bad cable management can all lead to failures or even fires. Always check attachment strength and confirm connections meet the right specs.
Other defects worth noting:
- Sloppy cell layup that throws off alignment
- Frame damage or bad seals
- Broken or discolored cells
- Foreign material stuck between layers
- Backsheet scratches or punctures
Corrective Actions and Continuous Improvement
If you find defects, act fast to stop more failures from popping up. For lamination issues, check encapsulant storage conditions and recalibrate lamination equipment settings for temperature and pressure.
Bill-of-materials (BOM) management really needs tight controls. Digital tracking systems help verify component compatibility before assembly, so you don’t mix up materials and cause defects.
Add quality checkpoints at critical stages in the process. Automated optical inspection after layup can catch alignment mistakes before lamination.
Train production staff on careful handling to cut down on cell breakage. Data-driven quality assurance lets you spot patterns across batches—track defect types, frequency, and root causes in a single database.
That way, you can focus improvements where they’re needed most. Set up feedback loops between inspection teams and production managers.
Weekly quality reviews help you respond quickly to new defect trends, so you don’t end up with a warehouse full of faulty panels.
Documentation and Reporting Requirements
Your inspection documentation should include detailed defect descriptions, photos, and location info for each panel. Use standardized forms to capture serial numbers, defect types, severity, and inspector signatures.
Quality reports need to sort defects into three buckets: critical (safety or major performance impact), major (performance loss), and minor (cosmetic stuff). This makes it easier to prioritize fixes and decide if a panel passes or not.
Keep records from factory audits, production checks, and pre-shipment inspections. These files help if warranty claims or performance questions come up later.
Hang onto all inspection data for at least 25 years to match typical panel warranties. When you report to stakeholders, communicate quality metrics clearly.
Include defect rates per thousand panels, trends over time, and updates on corrective actions. Mention any changes in manufacturing processes or materials that could affect quality.
Quality Control in Solar Panel Manufacturing and Assembly
Manufacturing quality control checks both materials and assembly precision, while solid grounding and bonding protect electrical safety and system performance.
Module Assembly and Material Verification
Your module assembly process needs strict oversight from start to finish. Confirm each component matches the bill of materials before you even start putting things together.
That means checking solar cells, encapsulant, backsheets, and junction boxes against the specs. During layup, make sure cells line up with precise spacing.
Misaligned cells drag down output and can cause reliability headaches later. Your quality team should check cell positioning before lamination kicks off.
Key verification points:
- Encapsulant storage (watch temperature and humidity)
- Lamination process (pressure, temperature, time)
- Junction box attachment and adhesive
- Frame assembly alignment and torque
Lamination defects—bubbles, edge delamination—are the top manufacturing headaches. You can avoid most by keeping encapsulant storage and lamination cycles under control.
Recent numbers show US factories have higher rates of critical defects than established plants in Vietnam and Indonesia. That’s not great, but it’s fixable with better process discipline.
Grounding and Bonding Best Practices
Your grounding system protects both people and gear from electrical faults. Make sure all metal frames are connected to the grounding conductor with hardware rated for outdoor use.
Bonding jumpers need to be sized right for the system’s voltage and current. Test continuity between all grounded bits during assembly—connections should show resistance under 1 ohm.
Critical bonding steps:
- Use listed grounding clips or lugs
- Apply anti-oxidant compound on aluminum
- Check torque specs for all ground connections
- Log resistance readings for each module string
Your inspection process should catch loose connections, missing jumpers, or rusty hardware before panels leave the factory. Missing these details can lead to equipment damage or worse.
Frequently Asked Questions
Solar panel quality control means meeting specific standards, using the right tests, and having clear defect criteria. Good documentation and sampling protect your investment and your warranty rights.
Which inspection standards and certifications should a solar panel meet before acceptance?
Your solar panels should comply with IEC 61215 for design qualification and type approval. This standard checks if modules can survive long-term environmental stress.
IEC 61730 covers safety for construction and electrical performance. For North America, you need UL 1703 certification.
European installs require CE marking to show compliance with EU safety rules. These certifications prove manufacturers have tested modules using global protocols.
TUV certification adds another layer. It confirms that actual production matches the tested design.
Double-check that the Bill of Materials in your shipment matches the Construction Data Form filed with the certifier.
What are the most effective factory acceptance tests to verify module reliability and performance?
Flash testing at Standard Test Conditions measures real power output. This uses a solar simulator at 1000W/m², 25°C, and AM1.5 spectrum to get an IV curve.
Accept only modules with positive tolerance ratings—for example, a 400W panel should test between 400W and 405W. Electroluminescence (EL) testing finds invisible defects before and after lamination.
The first EL scan spots cracked cells and soldering problems. A second scan after lamination checks that the process didn’t add new damage.
Wet leakage current testing checks electrical safety in damp conditions. Modules should handle 1000V for 60 seconds with less than 50µA leakage.
Insulation resistance testing at 500V DC should read above 40 megaohms per square meter of module area. It’s a mouthful, but it’s important.
How should electroluminescence imaging results be interpreted to identify microcracks and cell defects?
EL images show cells as grayscale—brighter means better electrical activity. Dark patches mean current isn’t flowing right.
Classify defects by size and location to decide if a panel passes. Critical defects include dendrites and cracks that cross busbars—these get rejected every time.
Major defects are micro-cracks over 10mm or dark areas covering more than 5% of a cell. Minor defects are micro-cracks under 2mm in non-critical spots away from busbars.
You can accept minor flaws within set AQL limits. If you see dark corners not touching busbars, they usually don’t hurt performance much.
What acceptance criteria should be used for visual defects such as scratches, discoloration, and backsheet issues?
Scratches on the front glass are okay as long as they’re under 50mm and don’t go deeper than the surface coating. If there are multiple scratches, they can’t intersect or make a pattern that might concentrate stress.
Any scratch that reaches the cell layer? That’s a hard no—reject the module. Color variation between cells shouldn’t be visible from three meters away under normal lighting.
If you spot discoloration on the encapsulant or backsheet, that points to issues with EVA curing or material quality. Yellow or brown spots usually mean moisture’s gotten in or there was overheating during lamination.
Backsheet defects can show up as wrinkles, bubbles, or delamination at the edges. Bubbles bigger than 10mm or less than 20mm from the edge are a problem and create weak points.
Edge sealing has to be solid, with no gaps for moisture to sneak through. Any break in the seal is a risk.
How can sampling plans and AQL levels be set for incoming, in-process, and final inspections of modules?
ANSI/ASQ Z1.4 sampling standards help you figure out how many units to inspect, depending on lot size. For critical defects—think safety—you want an AQL of 0%. Zero tolerance there.
Major defects that affect performance usually get an AQL of 1.5 or 2.5, but it depends on how strict you want to be. When inspecting incoming materials, test every single cell with automated EL systems. Cell quality sets the tone for the whole module.
During string assembly, sample using General Inspection Level II. Check soldering and string continuity on a handful of representative samples.
Final inspection means 100% flash testing for power output on every module. If your in-process controls are solid, you can sample for visual and EL inspections instead of checking everything.
Third-party pre-shipment inspections usually look at 10-20% of finished modules, depending on the order and what AQL levels you’ve agreed on. That’s pretty standard, but you might want to tweak it if you’ve had issues before.
Which documentation and traceability records are essential to prove compliance and manage warranty risk?
Every module needs a unique serial number. That number should connect directly to its flash test report.
This report has to show the actual IV curve, power output, voltage, current, and fill factor measurements. It’s also important to note temperature coefficients and the exact testing conditions—sometimes people skip this, but you really shouldn’t.
For material traceability, you’ll want batch numbers for solar cells, glass, EVA, backsheet, and junction boxes. Ask suppliers for certificates of conformity that confirm their materials actually meet your specs.
Test reports for incoming materials should include PID resistance testing for cells. Don’t forget gel content analysis for EVA—it’s easy to overlook, but it matters.
Factory audit reports help confirm that manufacturing processes match certified procedures. Hang on to all relevant certificates, like IEC 61215, IEC 61730, UL 1703, and TUV reports.
Pre-shipment inspection reports, especially those with photos of defects or packing conditions, can help defend against transit damage claims. It’s a bit of a hassle, but it’s worth it when something goes wrong in shipping.


