
Commercial Solar Panel Installation 2026: B2B Project Best Practices
Commercial solar panel installation in 2026 just isn’t the same as last year. Federal incentives have shifted, utility rates are climbing, and businesses now face new deadlines that can really shake up project timelines and tax credits.
If you’re planning a commercial or industrial solar project this year, you’ve got to get a handle on these changes first. That’s how you protect your investment and squeeze out the most savings over the long haul.
The key to successful commercial solar panel installation in 2026? You’ve got to know how to navigate the new federal deadlines, design systems that match your energy goals, and work with experienced partners who can actually deliver on schedule.
Start construction before July 4, 2026, and you might still snag those federal incentives—if you get the system online by the end of 2027. You’ll need a plan for site assessment, permitting, procurement, and installation before that window slams shut.
This guide breaks down the most important best practices for B2B solar projects in 2026. You’ll see how to design a system that fits your facility, dodge common installation mistakes, and set your project up for reliable performance and solid returns over the next 25 years.
Key Takeaways
- Federal solar incentives have new deadlines in 2026 that affect when you need to start and finish construction
- Proper system design and experienced installation partners are critical for maximizing energy output and avoiding costly delays
- Commercial solar projects can deliver strong ROI through reduced energy costs and protection against rising utility rates
Critical 2026 Regulatory Updates and Incentives

The Big Beautiful Bill Act has really squeezed the incentive timelines. Commercial projects must begin construction by July 4, 2026, or be placed in service by December 31, 2027, to get the full federal tax credits.
New supply chain rules starting January 1, 2026, add compliance headaches for equipment sourcing and project eligibility.
Key Deadlines and Federal Policy Changes
You’ve got two main pathways to lock in federal tax benefits for your commercial solar project. Start construction before July 4, 2026, and you get full ITC eligibility with no placed-in-service deadline.
Miss that date, and you can still qualify, but only if your system is up and running by December 31, 2027. The material assistance rules (kicked in January 1, 2026) ban equipment from foreign entities of concern (FEOC).
Your supply chain needs an audit for compliance. Any project starting after December 31, 2025, faces these restrictions, so if you’re sourcing from restricted suppliers, it’s time to rethink your procurement strategy.
Treasury issued new “beginning of construction” guidance in August 2025 after an executive order. This has ramped up scrutiny and affects the safe harbor strategies companies used to rely on.
You’ll need to document your construction start in detail to avoid losing credit eligibility during IRS review. It’s not the year to cut corners on paperwork.
Investment Tax Credit and Federal Incentives
The federal investment tax credit (ITC) sits at 30% of your total project cost in 2026 for systems 1 megawatt or less. That includes solar panels, labor, wiring, mounting, and energy storage devices.
For example, a $200,000 installation knocks $60,000 off your federal tax bill. Not bad, right?
If you don’t have enough tax liability to use the full credit, you can transfer the ITC to someone else. This lets you sell the credit at a small discount to an entity that can use it.
Battery energy storage systems keep their extended eligibility through 2033 under Section 48E, so you’ve got more flexibility with storage-integrated projects. The 30% federal tax credit covers commercial and business-owned solar projects under the Clean Electricity Investment Credit framework.
But you’ll have to meet the compliance requirements, like domestic content preferences and FEOC restrictions, to qualify for the base credit rate.
Maximizing Bonus Depreciation and Accelerated Depreciation
Bonus depreciation lets you deduct a big chunk of your solar investment in year one. While 100% bonus depreciation is gone, you can still pair what’s left with the ITC for solid first-year tax benefits.
This helps your cash flow and boosts project economics. MACRS (Modified Accelerated Cost Recovery System) gives you accelerated depreciation over five years for commercial solar projects.
You can depreciate 85% of your system cost using MACRS if you claim the ITC, since the depreciable basis drops by half the credit amount. That gives you a predictable depreciation schedule and a better return on investment.
Your solar loan or lease structure matters here. Direct ownership through a solar loan lets you keep both the ITC and depreciation benefits.
If you go with a solar lease or PPA (power purchase agreement), those benefits go to the third-party owner, but you’ll still save through lower electricity costs.
State and Local Solar Incentive Programs
State and local rebates can vary a lot by location and can stack with federal incentives. You’ll want to dig into your specific area’s programs, since some states offer extra tax credits, grants, or faster permitting for commercial installs.
These programs usually have their own application process and deadlines, separate from federal incentives. RECs (Renewable Energy Certificates) can give you ongoing revenue in certain markets.
You generate one REC for every megawatt-hour your system produces. The value depends on your state’s renewable portfolio standards and market demand.
Some states let you sell RECs separately from the electricity your system generates. Demand charge reduction is another big financial perk.
Commercial electricity rates often include peak demand charges based on your highest usage during billing periods. Your solar system can cut these charges by offsetting usage during peak hours, and those savings add up over your system’s lifetime.
Designing and Planning Commercial Solar Installations
Commercial solar projects take detailed technical planning in four main areas: understanding your site and energy use, figuring out system capacity and layout, picking the right components and electrical setup, and dealing with grid connection and permitting.
Site Assessment and Energy Consumption Analysis
Start your site assessment by gathering 12 months of interval meter data at 15- or 30-minute resolution. Monthly totals just don’t cut it.
You need to spot peak demand in kW, daily load shape, and how usage shifts from summer to winter. Peak demand drives demand charge reduction calculations, which can really help project economics for industrial clients.
Get a structural survey done before you start designing. Most commercial flat roofs can handle 15-25 kg/m² of distributed load from ballasted solar mounting systems.
For systems above 50 kWp in most markets, you’ll need a structural engineer’s sign-off. Measure usable roof area by subtracting fire safety setbacks (about 0.5-1.0m from the edges), maintenance corridors around HVAC units and skylights (at least 1.0m), and structural load zones.
You’ll probably lose 20-35% of your roof area to these requirements. Document all obstacles—HVAC units, elevator shafts, parapet walls, and communication gear.
These can cause shading that hurts system performance. Don’t skip this step.
System Sizing, Orientation, and Layout
Figure out max capacity using your usable roof area. For south-facing arrays at 10° tilt, divide usable m² by 6.5 to get kWp.
East-west layouts? Divide by 5.5. East-west setups fit more panels per m² because the rows sit closer.
Contact your distribution system operator before you finalize system size. Grid connection capacity might limit export to 30-50% of system peak output in urban spots.
If export curtailment tops 10%, your project’s financial returns will take a hit. Aim for 70-85% self-consumption for commercial and industrial projects.
This gives you the most value by replacing pricey grid electricity, instead of exporting at lower feed-in rates. If your weekend or nighttime consumption drops a lot, maybe look into battery storage to bump self-consumption above 75%.
For flat roof systems, stick with 10-15° tilt to balance annual yield with wind load and row spacing. Higher tilt means more space between rows and heavier ballast.
Space rows to avoid winter solstice shading. Use this formula: d = h × cot(solar elevation angle at noon on December 21). It’s not glamorous, but it works.
Technical Solar Design and Component Selection
Your inverter setup depends on system size and roof shape. Use multiple string inverters for 50-200 kWp systems.
For projects above 500 kWp, switch to central inverters or string clusters. String inverters work best when your roof has different orientations or shading, since each string gets its own maximum power point tracking.
Don’t mix different orientations on the same MPPT input. South-facing and east-facing strings on one MPPT make the tracking algorithm pick a compromise that underperforms both.
Install DC combiner boxes if string cable runs go over 50m or if more than 12 strings feed one inverter. Size fuses at 1.25× the string’s short circuit current.
Add Type 1 and Type 2 surge protection for systems above 100 kWp. Your single-line diagram needs to show all major components from the solar array to the utility meter—include inverters, combiners, disconnects, transformers, and protection devices.
You’ll need this document for permitting and utility interconnection applications.
Utility Interconnection and Permitting
Submit your interconnection application to the utility early. Medium voltage connections (for systems above 500 kWp) can take 12-18 months in Germany and Italy.
Residential low voltage connections? Usually 2-6 weeks. This timeline can make or break your project schedule.
Systems above 500 kWp usually need a dedicated transformer and medium voltage (10 kV or 20 kV) connection point. Budget €40,000-€100,000 for this equipment and installation.
The utility will tell you exactly what’s needed based on grid capacity at your site. Work with your local authority (AHJ) to figure out which permits you need.
Commercial rooftop solar almost always needs a building and electrical permit. Your AHJ might also want fire safety docs or an environmental review, depending on system size and location.
Get structural calculations certified by a licensed engineer for ballasted systems. This proves your roof can handle the panel and ballast weight.
Include wind uplift calculations—use EN 1991-1-4 for European projects or ASCE 7 for US installs.
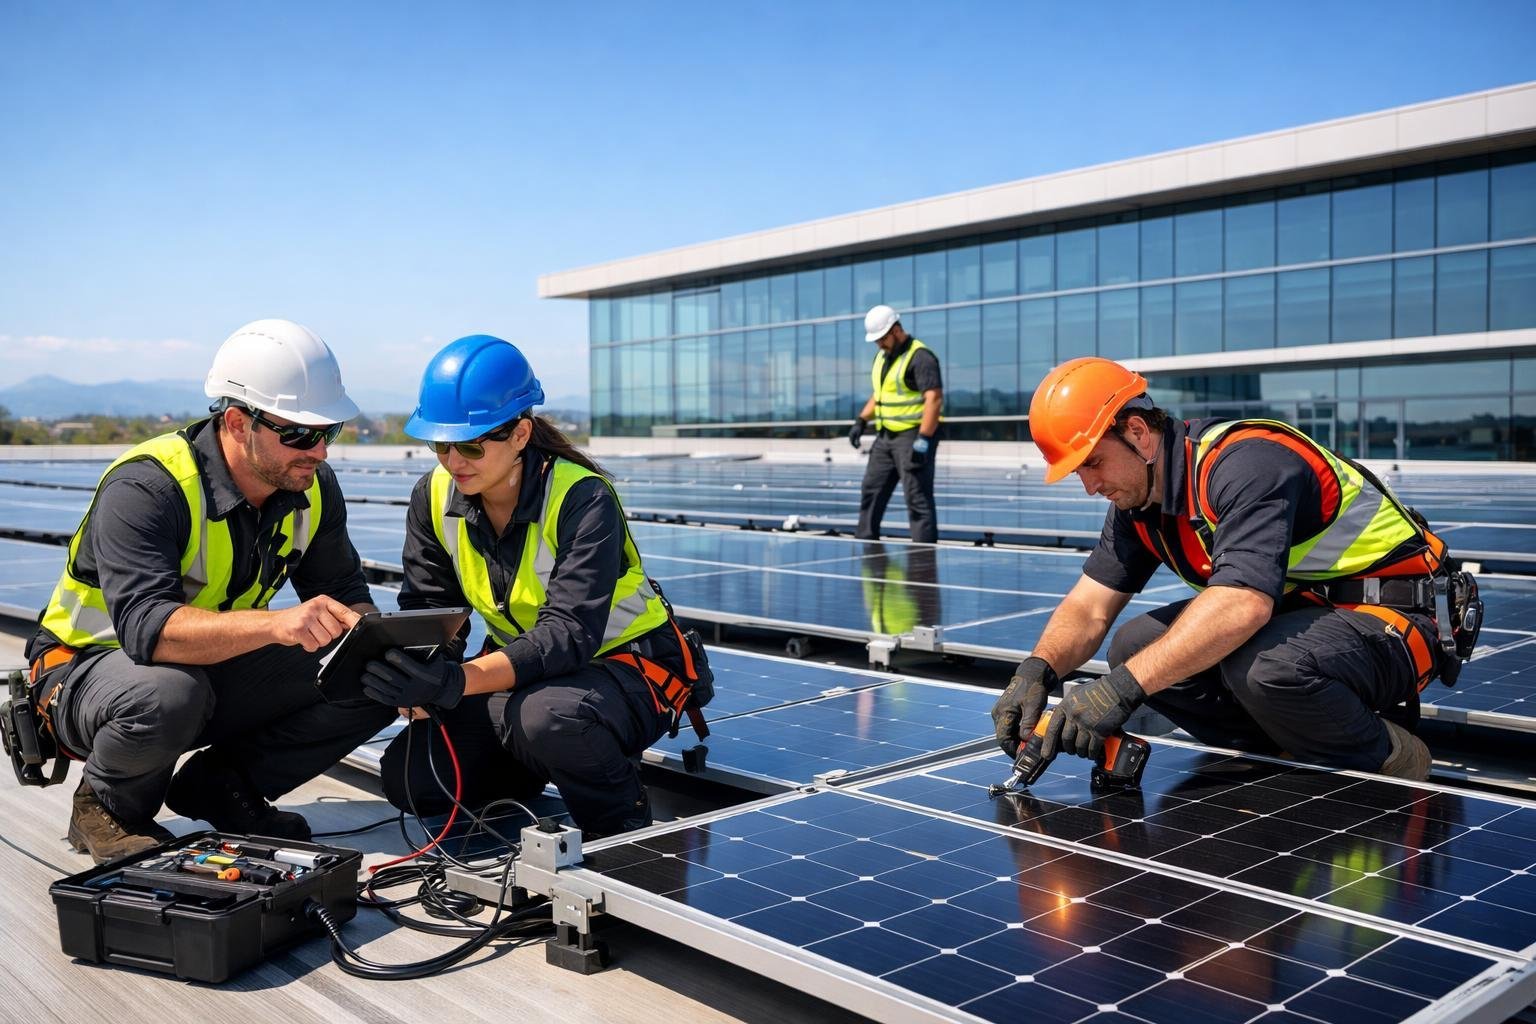
Installation Process and Best Practices for B2B Projects

Commercial solar panel installation takes careful coordination across procurement, mounting system installation, electrical integration, and final system validation. Each step builds on the last, and if you cut corners anywhere, the whole project could be at risk.
Pre-Construction Planning and Procurement
Your pre-construction phase sets the foundation for everything that follows. Make sure all permits are approved and in hand before you schedule equipment delivery.
Order solar modules and inverters 8-12 weeks before installation. Supply chain delays are still common in 2026, so don’t cut it close.
Create a site logistics plan that shows material staging areas and crane access points. Set up equipment delivery schedules and confirm with the building owner that loading docks and freight elevators are available when you need them.
For commercial solar projects, plan for 150-200 square feet of staging space per 100 kWp of system capacity. If you don’t have enough space, deliveries get messy fast.
Hold a pre-installation meeting with your crew, the electrical contractor, and the building facilities manager. Walk the roof together and mark spots for penetrations, cable runs, and equipment placement.
This walk-through helps avoid conflicts later, when changes become expensive. It’s a step you really don’t want to skip.
Order your mounting systems and racking components from manufacturers that provide engineering-stamped drawings for your specific roof. Generic racking without site-specific approval usually fails permitting inspections.
Solar Panel and Racking Installation
Start racking installation only after you check the roof membrane and finish any repairs. For ballasted systems on flat commercial roofs, use the manufacturer’s certified ballast calculation that factors in local wind loads per the National Electrical Code and building codes.
Install base rails or mounting frames first. Check alignment every 3-4 rows with a transit level or laser.
If you’re off by more than 0.5 degrees, you’ll run into issues during module installation and the finished array won’t look great. That’s not something you want clients to notice.
Space your mounting systems according to the engineer-approved drawings. For 10-degree tilt systems, standard row spacing is 1.5-2.0 meters to prevent winter shading.
East-west configurations allow tighter spacing—1.0-1.5 meters—since opposing rows only shade each other at extreme sun angles. That can help maximize roof space.
Handle solar modules with proper lifting equipment, especially on commercial jobs. A 450-watt panel weighs 24-28 kg, and you’ll be moving a lot of them.
Use panel carts or conveyor systems to safely move modules from staging to installation areas. Your crew will thank you for saving their backs.
Secure each solar panel according to the manufacturer’s specs, usually with 4 mounting clamps per module. Torque all bolts to the correct values using a calibrated torque wrench.
Under-torqued connections can let modules shift and develop micro-cracks. Over-torquing can crack the module frame. Neither is good.
Inverter Setup and Integration
Mount string inverters on interior walls if you can to protect them from the weather and temperature swings. If you have to mount them outside, use north-facing walls and shade structures to keep direct sun off and extend inverter life.
Run DC wiring in metal conduit from the array to the inverter location. Size conductors for no more than 2% voltage drop under full load.
For a 500-foot cable run at 600V DC with 50 amps, you’ll need at least 6 AWG copper conductors. Don’t skimp on wire size—it’s not worth the headaches later.
Label every string with permanent, weather-resistant tags that show string number, polarity, and expected voltage at standard test conditions. This makes inspections and troubleshooting a lot quicker.
Install DC and AC disconnect switches where your approved electrical drawings specify. The National Electrical Code requires rapid shutdown devices for commercial solar, usually built into your inverter system or added as separate optimizers.
Connect inverters to the building’s electrical service through a dedicated circuit breaker sized at 125% of inverter maximum output current. Make sure all AC wiring meets NEC requirements for conduit fill and wire sizing.
Commissioning, Testing, and Quality Assurance
Start system testing by measuring open-circuit voltage and short-circuit current for every string before connecting to inverters. String voltage should be within 2% of calculated values.
If you see bigger differences, check for wiring errors or damaged solar modules. Don’t skip this step—it’s the fastest way to catch problems early.
Perform insulation resistance (megger) testing on all DC circuits at 1000V DC. You want readings above 1 megohm to ground.
Lower readings mean you’ve got damaged insulation or moisture intrusion that needs fixing before you energize the system. Better safe than sorry.
Conduct IV curve tracing on a sample of strings—usually 10-20%—to verify performance matches manufacturer specs. IV curve testing can spot bypass diode failures or cell damage that basic voltage checks might miss.
Power up inverters following the manufacturer’s startup steps. Make sure all monitoring systems are talking to each other and production data shows up in your monitoring platform.
Check that all safety systems respond properly to test inputs. You don’t want surprises after handoff.
Complete final inspections with the authority having jurisdiction before you release the system to the customer. Fire safety inspections check that rapid shutdown equipment works and array layouts meet fire code requirements.
Document everything in your commissioning report: test results, photos, as-built drawings showing final cable routing, and copies of inspection approvals. Solid documentation protects you legally and helps the customer’s maintenance team down the line.
Maximizing Value, ROI, and Long-Term Performance

Commercial solar success really comes down to smart financial planning, reliable system monitoring, and strategic energy management. Your business needs to understand payback timelines, set up solid maintenance routines, and use storage solutions to squeeze the most value from your solar investment.
Battery Storage and Energy Management
Battery storage turns solar panel systems into real energy management tools. Storage lets you save extra solar power during peak production and use it when utility rates spike or the sun’s down.
This is especially useful for businesses facing demand charges. Discharging stored power during expensive peak periods—rather than drawing from the grid—can cut your energy costs by up to 30%.
Modern battery systems integrate right into your solar setup. They help you decide when to use, store, or sell power back to the utility.
That means more energy independence and some protection against rising utility rates. Most commercial battery installations pay for themselves within 7-10 years, and incentives or tax credits can help speed that up.
Financial Analysis, ROI, and Payback Calculation
Your payback period is how long it takes for energy savings to match your initial investment. Most commercial solar installs hit payback in 5-8 years, but it varies with system size, local utility rates, and incentives.
Calculate ROI by comparing total system costs against projected energy savings over the lifespan. A typical project brings 15-25% annual returns after you hit payback.
Key factors in your financial analysis include current electricity rates, expected utility rate increases (usually 2-4% per year), and tax incentives. Projects need to start construction by July 4, 2026 or be placed in service by December 31, 2027 to get federal tax credits under current rules.
Ask your installer for detailed financial models showing monthly savings, cash flow, and net present value calculations. Make sure these numbers include system degradation (usually about 0.5% per year) and maintenance costs.
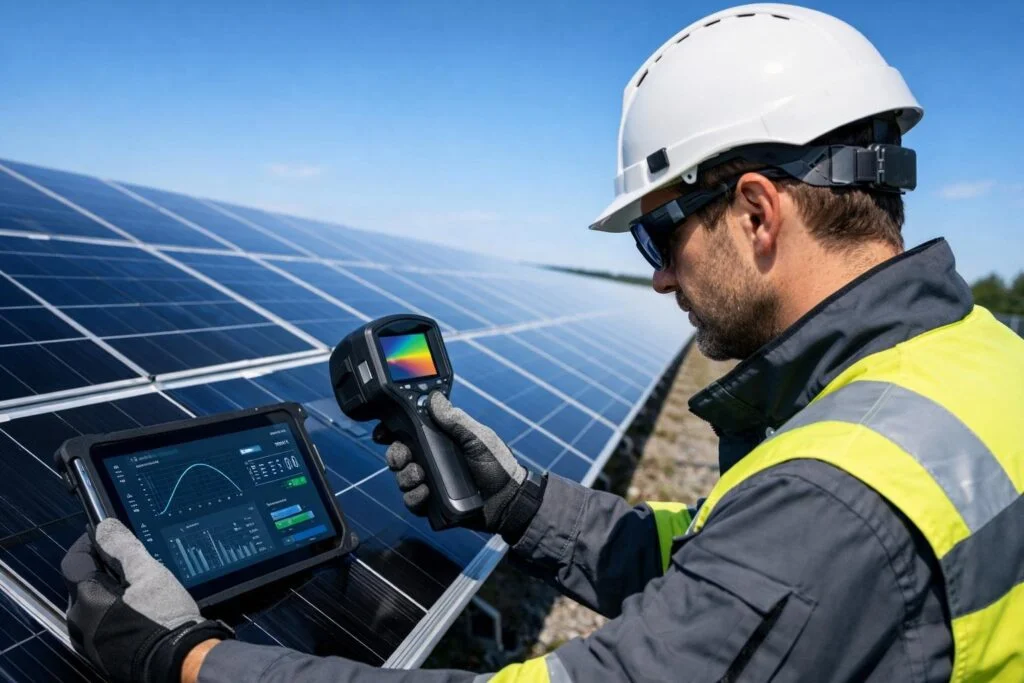
Monitoring, Maintenance, and Warranties
Real-time monitoring systems track your solar panel performance and alert you to issues before they hurt production. Most platforms show energy generation, system efficiency, and possible problems on web dashboards or mobile apps.
Plan for annual professional inspections and basic maintenance. Clean panels quarterly in dusty areas and check electrical connections twice a year.
Budget about $15-20 per kilowatt per year for maintenance. Most commercial systems include a 25 year warranty on panels, 10-15 years on inverters, and 5-10 years on installation workmanship.
Read warranty terms carefully—they can have a big impact on your long-term ROI. Keep good records of all maintenance and performance data. That documentation proves reliability and helps spot trends over time.
Sustainability, ESG, and Energy Independence
Your solar installation directly supports ESG goals by cutting carbon emissions and showing environmental commitment. Most commercial systems offset 3-4 tons of CO2 per kilowatt installed every year.
Energy independence shields you from volatile utility rates and gives you more control over operating costs. That stability is huge for long-term financial planning and helps protect your business from grid disruptions.
Using renewables boosts your sustainability reporting and can make your company more appealing to environmentally conscious customers and investors. Many businesses find their solar installations become real marketing assets.
Commercial solar projects also qualify for LEED points and other green building standards. These certifications can increase property value and sometimes even lower insurance costs, positioning your business as a sustainability leader.
Frequently Asked Questions
Commercial solar projects involve multi-month timelines and detailed engineering studies. You’ll need coordination across technical, legal, and financial teams.
The questions below cover procurement, permitting, quality assurance, and financial structures—the stuff that really determines if a project delivers on its promises.
What is the typical project timeline for a commercial solar installation from feasibility study to commissioning?
A commercial solar project usually takes 6 to 18 months from feasibility study to commissioning. The timeline depends on system size, site complexity, grid connection requirements, and local permitting.
The feasibility study phase lasts 2 to 4 weeks. That includes site assessment, energy analysis, preliminary design, and financial modeling.
You’ll need accurate load data and utility tariff info to build reliable projections. Design and engineering takes 4 to 8 weeks for most commercial projects.
This phase produces detailed electrical drawings, structural calcs, equipment specs, and grid connection studies. Projects needing high-voltage interconnection or big structural upgrades will take longer.
Permitting and approvals add another 8 to 16 weeks in most places. You’ll need building and electrical permits, grid connection approval, and sometimes environmental or planning consent.
Grid connection approval often causes the longest single delay. Procurement takes 4 to 8 weeks once you have permits in hand.
Lead times for inverters, transformers, and special mounting systems vary by manufacturer and order size. Ordering equipment before permits are final is risky—don’t do it unless you’re sure.
Construction and installation can take 4 to 12 weeks, depending on system size. A 100 kW rooftop system installs in 3 to 4 weeks. A 1 MW ground-mount job might need 8 to 12 weeks.
Weather, site access, and workforce availability all affect this schedule. Commissioning and grid connection usually require 1 to 3 weeks after installation for system testing, relay setup, utility inspection, and final sign-off.
Which site and structural assessments are required before finalizing a rooftop or ground-mount PV design?
Rooftop commercial solar needs a structural assessment. You have to make sure the roof can actually handle the extra weight from panels, rails, and even some snow—usually about 2 to 4 kg per square meter.
Most newer commercial roofs are fine, but older buildings or lightweight metal roofs might need upgrades. It’s worth checking before you get too far.
Get a roof condition survey before you commit. If a roof only has 5 to 10 years left, installing solar can be a headache when it’s time for a replacement halfway through the solar system’s expected 25-year run.
If the roof needs replacing soon—say, within 5 years—just do that first. It saves you a lot of pain later.
Shading analysis is a big deal. Nearby buildings, trees, or rooftop equipment can cause surprising production losses, even if just a few modules get shaded.
For commercial projects, use LiDAR or drone-based shading analysis to spot shading losses you might miss from the ground. It’s more thorough than just eyeballing it.
Don’t skip the electrical infrastructure assessment. You need to know if the service panel, transformers, and switchgear can handle the new solar setup.
Big commercial systems sometimes need service upgrades or dedicated transformers. It’s better to find that out before construction starts—no one likes surprise costs halfway through a job.
Ground-mount systems have their own quirks. Geotechnical surveys tell you about soil type, bearing capacity, and groundwater levels.
Soils like clay, high water tables, or rocky spots can really change foundation design and cost. A geotechnical report runs about €2,000 to €5,000, but honestly, it’s cheap insurance against foundation failures.
Environmental and land-use assessments are non-negotiable for larger ground-mount systems. You’ve got to check for protected habitats, flood zones, archaeological issues, or planning restrictions.
Most regions require these checks for systems over 50 kW. Skipping them can waste a ton of engineering time on sites that’ll never get approved anyway.
How should businesses evaluate EPC contractors and ensure quality control during procurement and construction?
Start with certifications and experience. Look for contractors with ISO 9001, proper electrical licenses, and insurance that matches your project’s scale.
If you’re bidding out a €500,000 project, the contractor should carry at least €2 million in professional indemnity and public liability insurance. Anything less feels risky.
Ask for reference projects similar to yours. Someone who’s done a few residential jobs isn’t automatically ready for a 500 kW commercial rooftop.
Demand at least three references from the last two years. It’s worth calling them up directly—don’t just take a list at face value.
Look closely at the equipment they specify. The best contractors use tier-1 solar modules with 12-year product warranties and 25-year performance warranties.
Inverters should come from manufacturers with a local presence and solid 10-year warranties. If you see unknown brands or fuzzy warranty details, that’s a big red flag.
Check their design documentation. A real commercial solar proposal has single-line diagrams, structural load calculations, shading reports, and solid energy yield simulations.
If their proposal skips technical details or just throws out rough numbers, that’s not a good sign. You want someone who’s done their homework.
Make sure the contract includes performance guarantees. The contractor should guarantee at least 90% of the projected first-year yield.
If production falls short because of their design or installation, they should fix it—on their dime. Don’t let that slide.
Set up payment terms tied to milestones. A typical flow: 10% deposit, 30% when major equipment arrives, 40% after installation, and 20% on final commissioning and grid connection.
Never pay the full amount before the system’s actually producing power. That’s just asking for trouble.
Bring in a third-party inspector at key stages. Independent inspections during mounting, electrical rough-in, and final commissioning can catch issues before they blow up your budget.
Budget €2,000 to €5,000 for independent inspection on a mid-sized project. It’s money well spent for peace of mind.
What interconnection, permitting, and code compliance steps most often impact commercial solar project schedules?
Grid interconnection approval tends to cause more schedule delays than any other permitting step. Distribution network operators look over your interconnection application to see if the local grid can handle the extra solar power.
This review usually takes anywhere from 8 to 20 weeks, depending on the system size and how much room is left on the grid. You need grid connection approval before you start construction in most regions.
If you start installing before you get approval, you risk the utility flagging technical issues—sometimes after you’ve already bought or installed equipment. That can be a headache nobody wants.
Building permits need structural calculations stamped by a licensed engineer. The permit authority checks your structural plans to make sure the roof or ground-mount foundation meets building codes.
If your structural documentation is incomplete or off the mark, expect permitting timelines to stretch by 4 to 8 weeks. Electrical permits also come into play.
They require detailed electrical diagrams showing panel locations, conduit routes, disconnect switches, and protection.


